This guide will show you how to configure Google Apps content compliance, so that you can identify payment numbers and forward the email to ShieldQ's secured Inbox.
Content compliance setting
The content compliance setting lets you configure rules that specify what action to take for messages, based on predefined sets of words, phrases, text patterns, or numerical patterns. You can choose whether these messages are rejected, or delivered with modifications; for example, to notify others when the content of a message matches the rules that you set.
Content compliance will then scan messages for content that matches the rules that you have configured. Similar to other email security settings, the content compliance setting applies to all users in an organizational unit. Users within child organizations inherit the settings you create for the parent organization. You also have the option to add multiple content compliance settings to each organizational unit.
Please note: Changes to the content compliance setting might require up to one hour to take effect. You can track prior changes with the Admin console audit log.
Notes:
- While most advanced Gmail settings only apply to users, the Default routing setting can also be applied to mailing lists.
- Content compliance setting supports scanning text attachments and common attachment types, such as .doc, .xls, and .pdf. (Both simple matches and advanced content matches that include BODY will include the extracted text from the attachments. See the instructions below for more details on setting up content matches.)
- Content compliance supports non-ASCII characters.
To configure content compliance settings for your domain or organizational unit:
1. Sign in to the Google Admin console.
2. From the dashboard, go to Apps > G Suite > Gmail > Advanced settings]
3. Scroll down to the content compliance section:
- If the setting's status is "Not configured yet," click "Configure" on the right-hand side (the "Add setting" dialog box display).
- Locally applied, click "Edit" to edit an existing setting (the "Edit setting" dialog box displays), or click "Add another" to add a new setting (the "Add setting" dialog box display).
- Inherited, click "View" to view the inherited setting, or click "Add another" to add a new setting (the "Add setting" dialog box display).
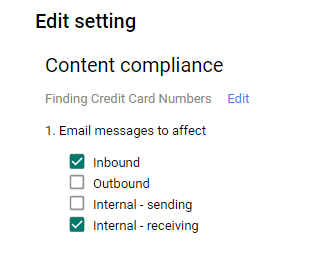
4. In the Content compliance window, enter a unique name for this setting; for example, “Filter credit cards to ShieldQ.”
5. Select the “Email messages to affect” option to “Inbound.”
6. In the “Expression” segment, click on “Add:”
- Select “Advanced content match.”
- In the Location, select “Body.”
- On the Match type, select “Matches regex.”
- Type your regular expression to find credit card numbers; for example, you can use “\b(?:\d[ -]*?){13,16}\b”
- Click "Save."
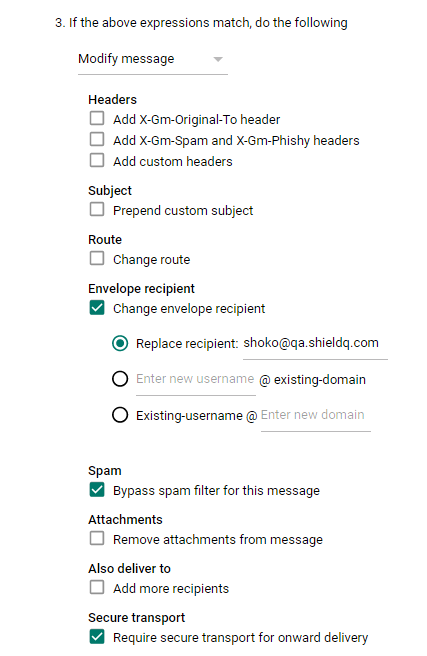
7. Check the “Change envelope recipient” checkbox.
- In the “Replace recipient:” section, enter your ShieldQ email address.
8. Check the “Require secure transport (TLS)” checkbox.
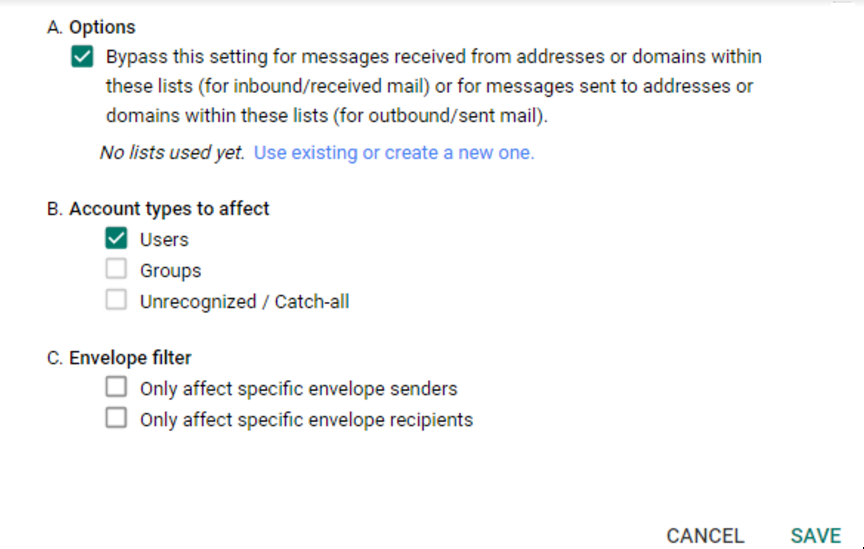
9. When you're finished making changes, click "Add setting" to close the dialog box.
- Click "Save" at the bottom of the advanced settings page